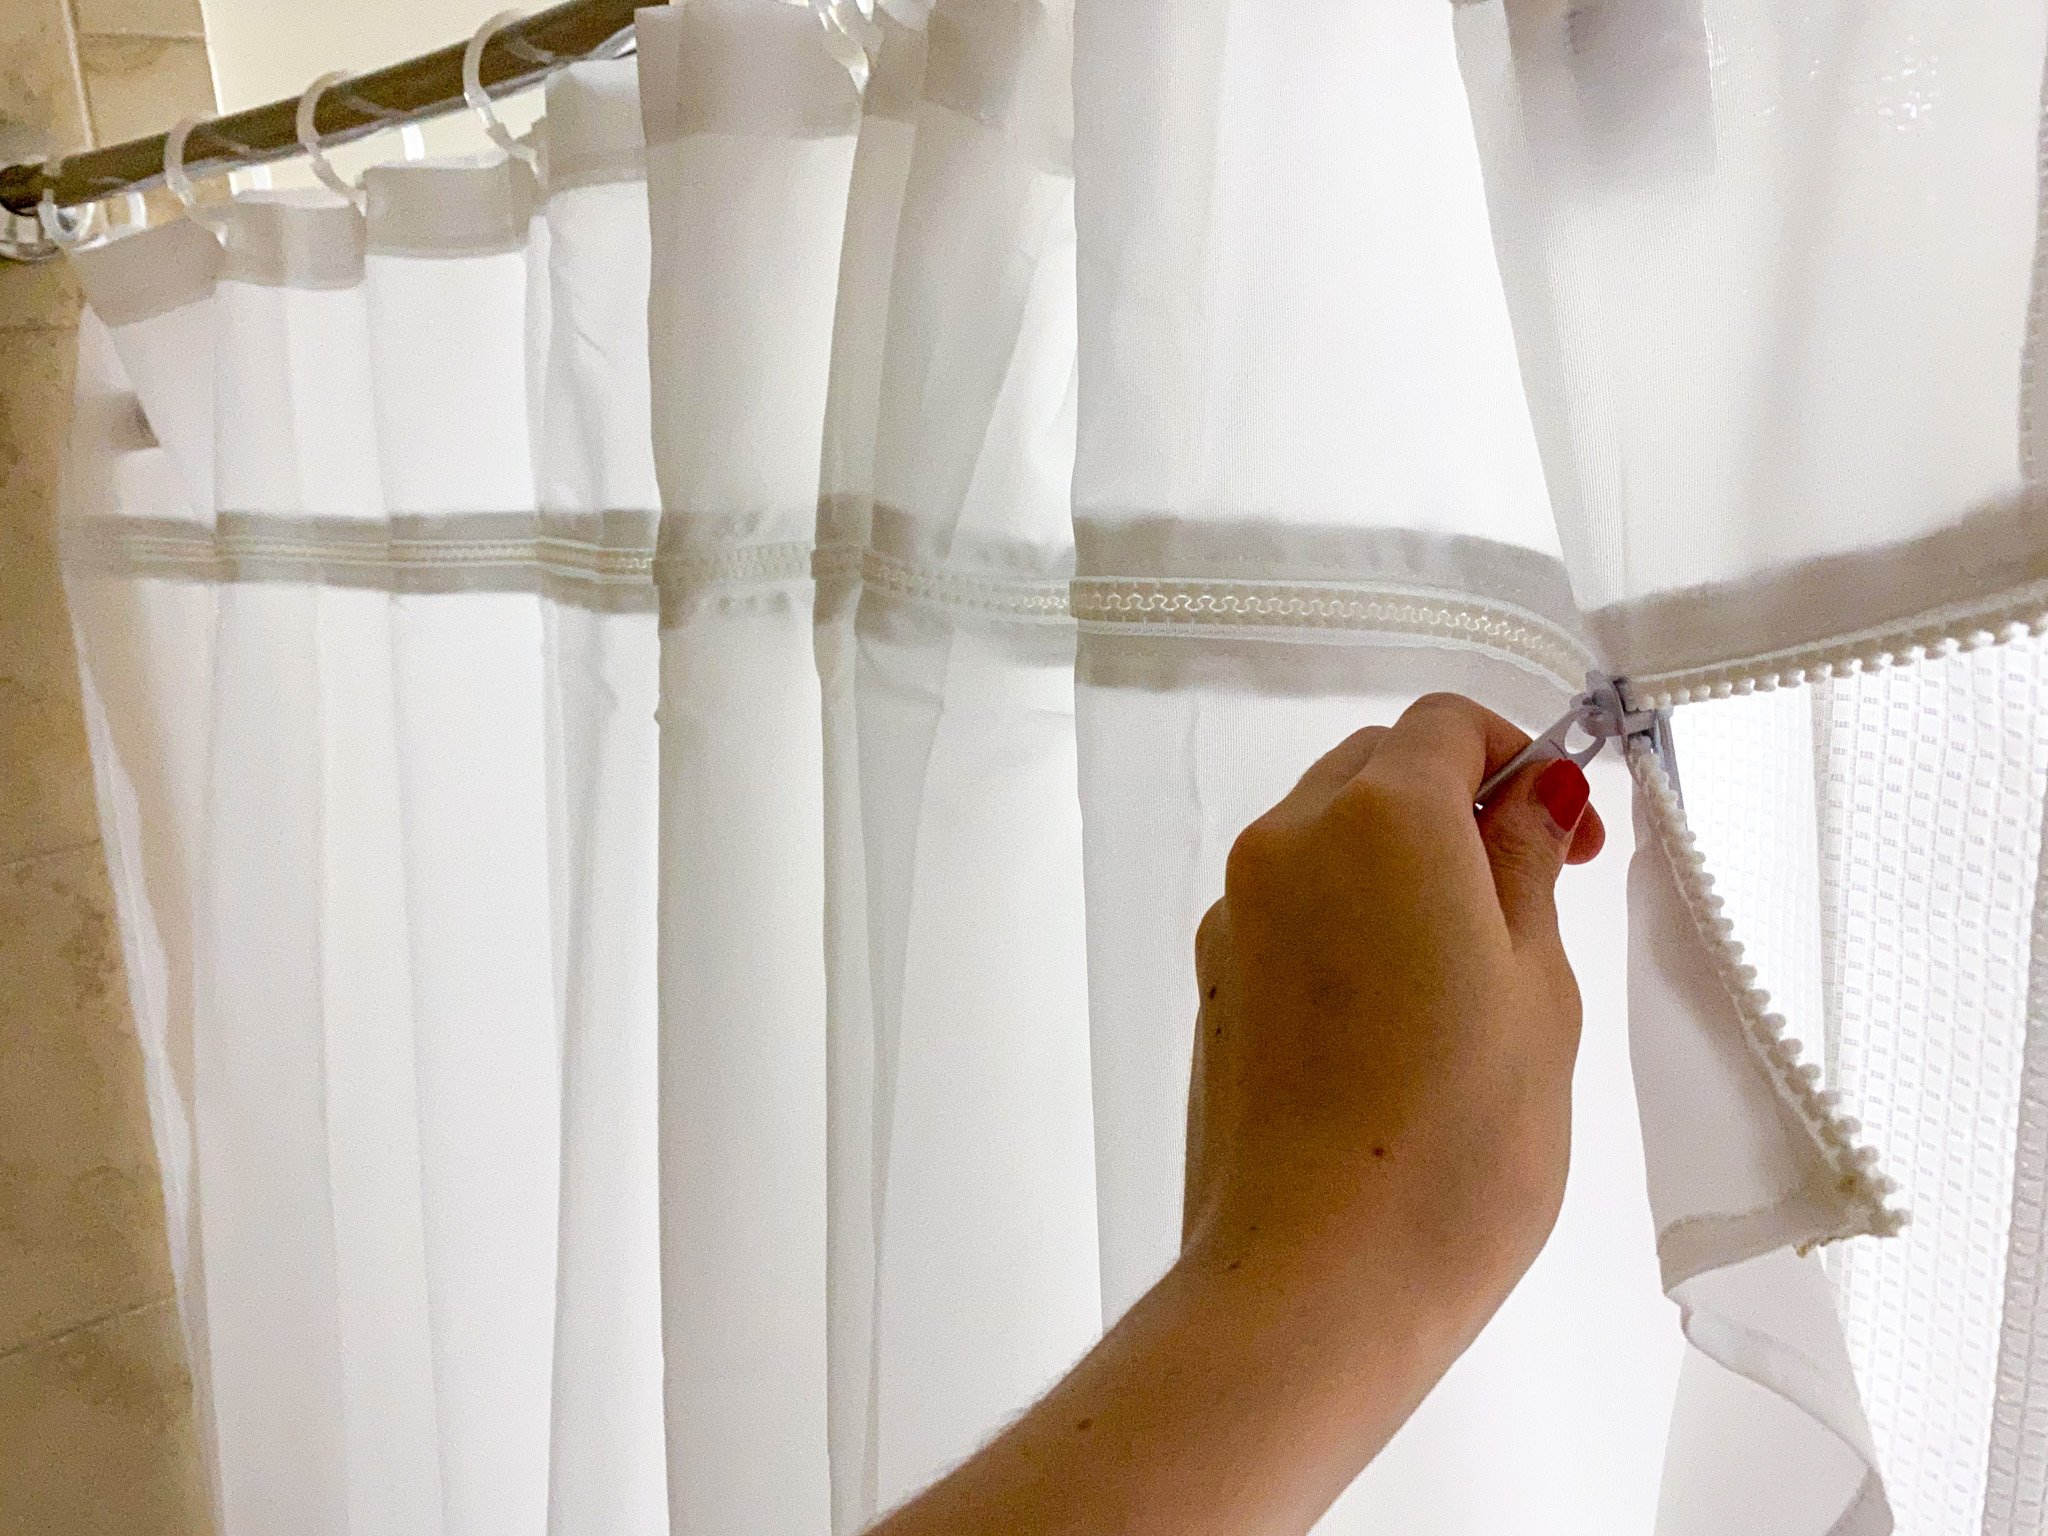
DIY Zipper Shower Curtain Liner to Make Cleaning EASY
Let’s DIY your very own zippered shower liner for unbelievably easy cleaning! I have to clean my shower curtain probably every 2-3 weeks (at least once a month is the recommended frequency).
If you don’t clean your shower liner often, then you might not think about this until you are actually doing it, but removing all 12 rings of the shower liner and then hanging all 12 of them back up is so annoying to me. Not to mention, hard to reach and have to step up onto the shower edge to reach.
I love the luxury feel of a fabric shower liner and the price is not at all that different from the plastic ones. I don’t know about you, but for me, the plastic shower liners are a struggle to clean. You either have to scrub every inch of the liner awkwardly in your shower, or you can fill your tub with water and some cleaner and leave it soaking for some time. Fabric liners are all machine washable, but I do feel like they need cleaning a little more often than the plastic ones. Taking down the curtain and hanging it back up just takes me too much time especially when I have only the kids nap time to clean the bathroom, cook dinner, do dishes, and fold laundry.
I wanted to find a cheap fun solution to this, so I thought of adding a zipper to my liner. It’s now so easy to remove and hang back up that cleaning my liner is not any more time consuming than throwing it in the wash. It’s an easy sewing project and so worth it. You only need a 70-inch zipper and of course a fabric shower liner. All of this you can find easily on Amazon.
What you need to DIY your shower liner
72″ zipper – linked here – standard curtain width is 70” so this zipper will be 2” longer than what we need. If you find a 70” zipper, that would be ideal, but make sure that it is one that you can separate completely like you would for a zipper jacket.
Fabric shower liner – linked here
2 small buttons
Sewing machine – I have this one
Step by Step Instructions
Mark a straight line with a pencil using a straight edge and a ruler. I drew my line 6 inches from the top of the liner. I don’t recommend too much closer to the top because the zipper may not be flexible enough to open the curtain comfortably. I also do not have any professional straight edge tool. I used a long piece of metal trim that my dad had lying in his garage.
Use scissors to cut along the line you drew.
Using a serger machine, finish both edges of the cut fabric. We do this so that the raw fabric edge doesn’t fray. I love my Brother Serger. It’s very user friendly, even for non-sewing experts. If you don’t have a serger machine, your sewing machine may have an option that would work for a raw edge, either with zig-zag or other patterns. The finished edge should look like below.
Now that we have a finished edge. Use sewing pins or clips to pin the fabric to one side of the zipper. Fold the finished edge of the fabric over so that you have a clean and pretty edge to sew onto the zipper. Keep your zipper closed.
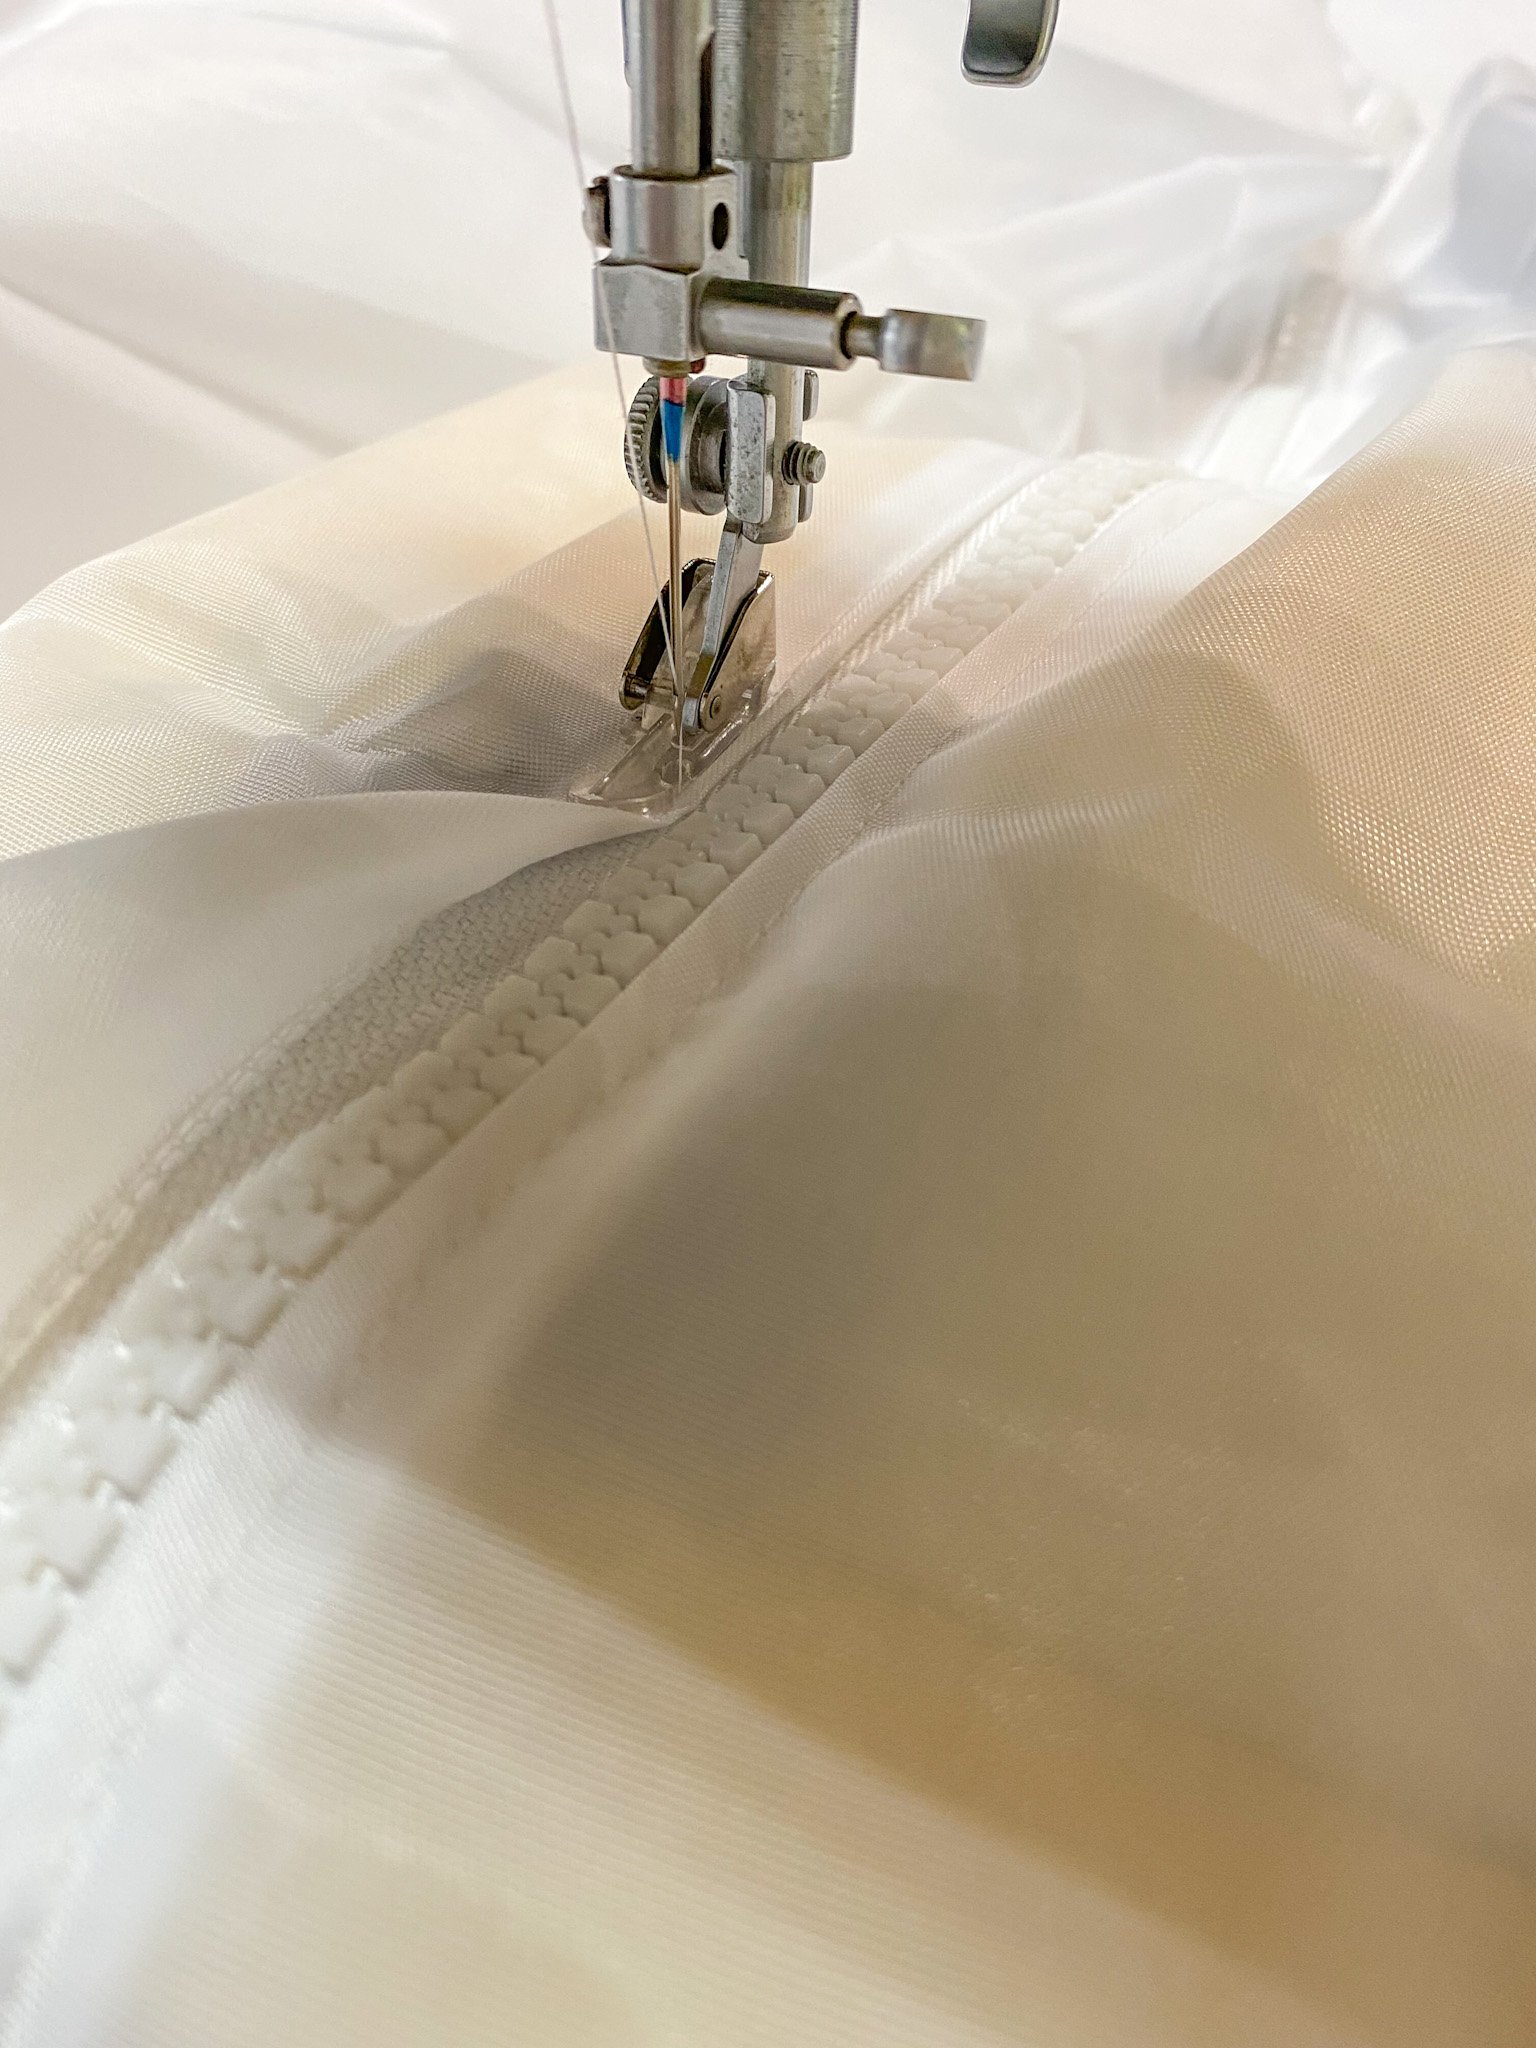
Keep the zipper closed for this step. Using the zipper foot of your sewing machine, sew along the length of zipper to attach one side of the curtain. Make sure to reverse stitch at the beginning and end of where you sew. Repeat this for the other side of the zipper and curtain. This zipper is reversible, so it doesn’t matter which side of the curtain I put it on. If you don’t have a reversible zipper then make sure to sew it on the correct side of the curtain.
You now have a functional zipper on your curtain. However, as I mentioned in the materials section, this zipper is 2 inches longer than our liner. If you have a zipper longer than your liner, then go to the next step. If you found a 70-inch zipper then you are finished! (please send me the link to your 70-inch zipper since I could not find one).
Since our zipper is 2 inches longer we need to use something to shorten it while still blocking the zipper from coming off. The simple solution is buttons! Find any 2 small buttons and sew then onto the zipper end. Make sure to open your zipper before you attach the buttons. The trick is to add the buttons VERY close to (almost on top of) the zipper teeth. Use a needle and some thread to attach the buttons. This will block the zipper from coming off. I sewed them onto the backside of the curtain so they would show from inside the shower. Once the buttons are attached and you verified that the zipper doesn’t come off, go ahead and cut the extra zipper length.
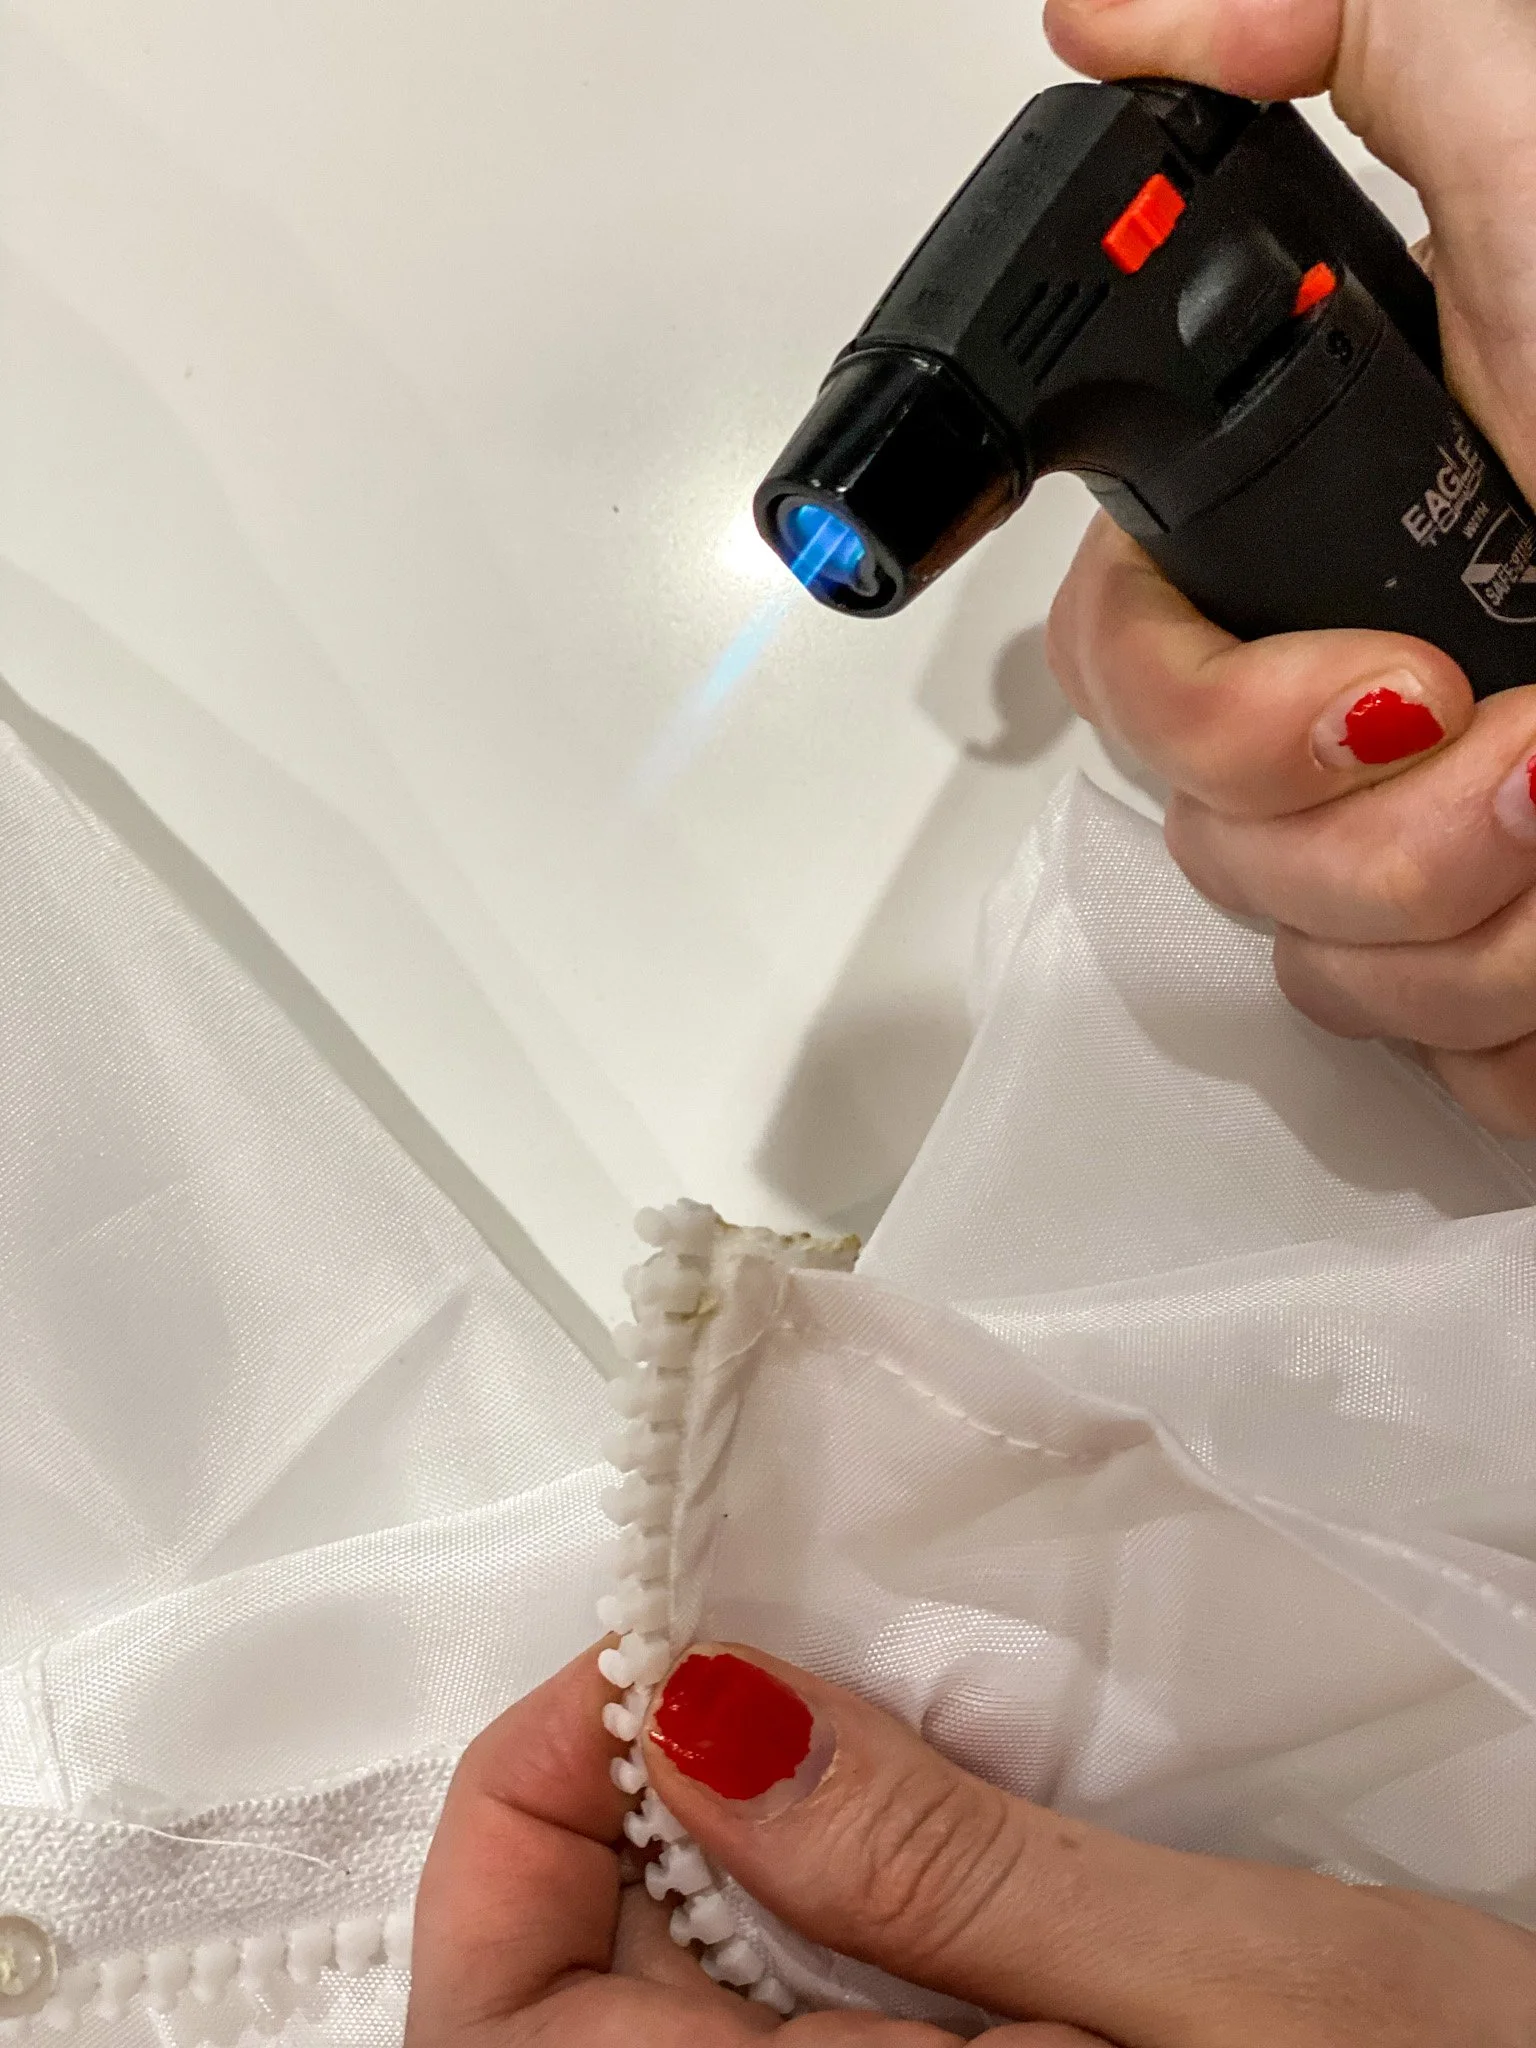
Use a lighter, match, or torch to carefully burn the edges of the zipper that you cut. We do this so that the edges don’t fray. Don’t torch it for too long, you don’t want it to catch on fire you just want to melt a little of the plastic so that it becomes a hard edge.
There you go, you now have your own zipper curtain! Enjoy the luxury of one less time consuming and annoying task. The liner I have is a very light fabric so you can see the zipper slightly from inside the shower. It this bothers you, go for a thicker liner. Please excuse my poor attempt at taking good pictures behind a curtain. The zipper shows very much in the picture below because the light is from behind.
I am so happy with my DIY shower liner! I love the five-star resort feel of a fabric liner, but always hated the frequency of having to clean it. Now with my zippered liner, I can easily remove it and throw it in the wash. It’s so easy to remove and hang back up that I just throw it in whenever I wash my bathroom towels.
I hope you enjoyed this DIY and was able to follow the step-by-step. If you have any questions regarding this project or of anything please leave a comment below or contact me directly. For more fun projects, make sure to subscribe below.


